This article is an How To directly linked to my previous article about the E-ink GPS topographic’s map. I’m aware about the difficulty can represent reproducing my work to rebuilding your own eReader. That’s why i have decomposed in this tutorial the simplest way to achieve your own NOOK.
Little remembering. The Nook simple Touch is a Barne & Nobles eReader released in 2011. It’s run a very low hardware, literaly less than a Raspberry PI Zero. (OMAP monocore 800mhz and 256mb of RAM). But it run a rootable android 2.1 (Eclair) and had an accessible UART port.
And.. like all other eReader his baterry life impressive. Now let’s go !
Buy componants
You will need to buy somes compomants like the Nook Simple Touch itself or the GPS module, of course you can use some part you already have.
- Nook Simple Touch E-reader (BNRV300) mostly from Ebay
- A 32Gb MicroSDXC + SD adaptater available anywhere
- GPS Module GP735 + 6 wire JST cable from Sparkfun
- The 3D Printed case designed for the Nook NST (see lower)
- A 1k and a 10k resistors, it’s available anywhere
- A small switch, i recommand the GB147 on-off switch
- A newer and larger battery, you can choose between two :
- Nook BNRV300 2150mAh battery from Ebay
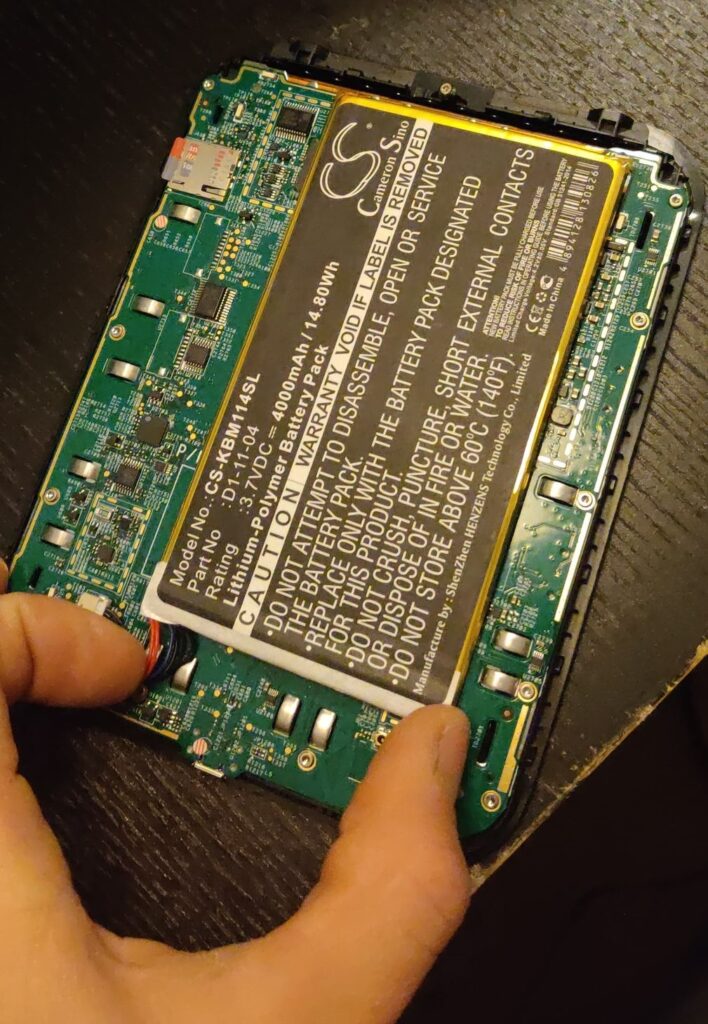
- Kobo D1-11-04 4000mAh battery from Ebay
- Five Countersunk M3*14 Screw
- Some time, enthusiasm and cofee
The 3D Printed Case
The 3D model parts files of the case are available on my Thingiverse page.
About the 3D printed case you have to take a choice. First of all you can decide you don’t need it at all and tinker your eReader. The other costless possibility is to ask to a friend or a Fablab into your city to 3D printing the case for you.
But personaly i will recomand you to pay ~80€ for online service of 3D SLS nylon printing like Sculpteo. Because it’s easier, give the bests finitions, and also because nylon is a good material for outdoor usage (UV, temperature).
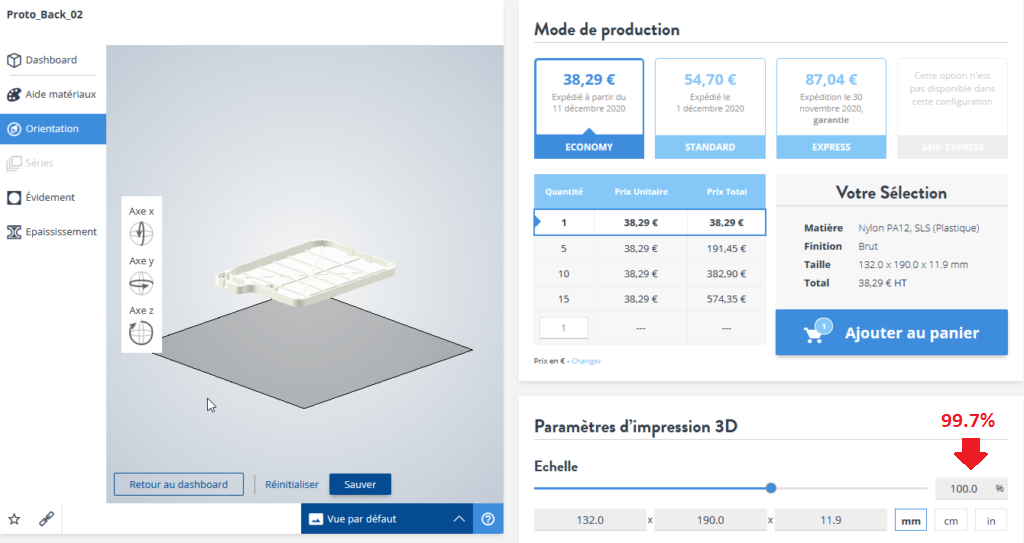
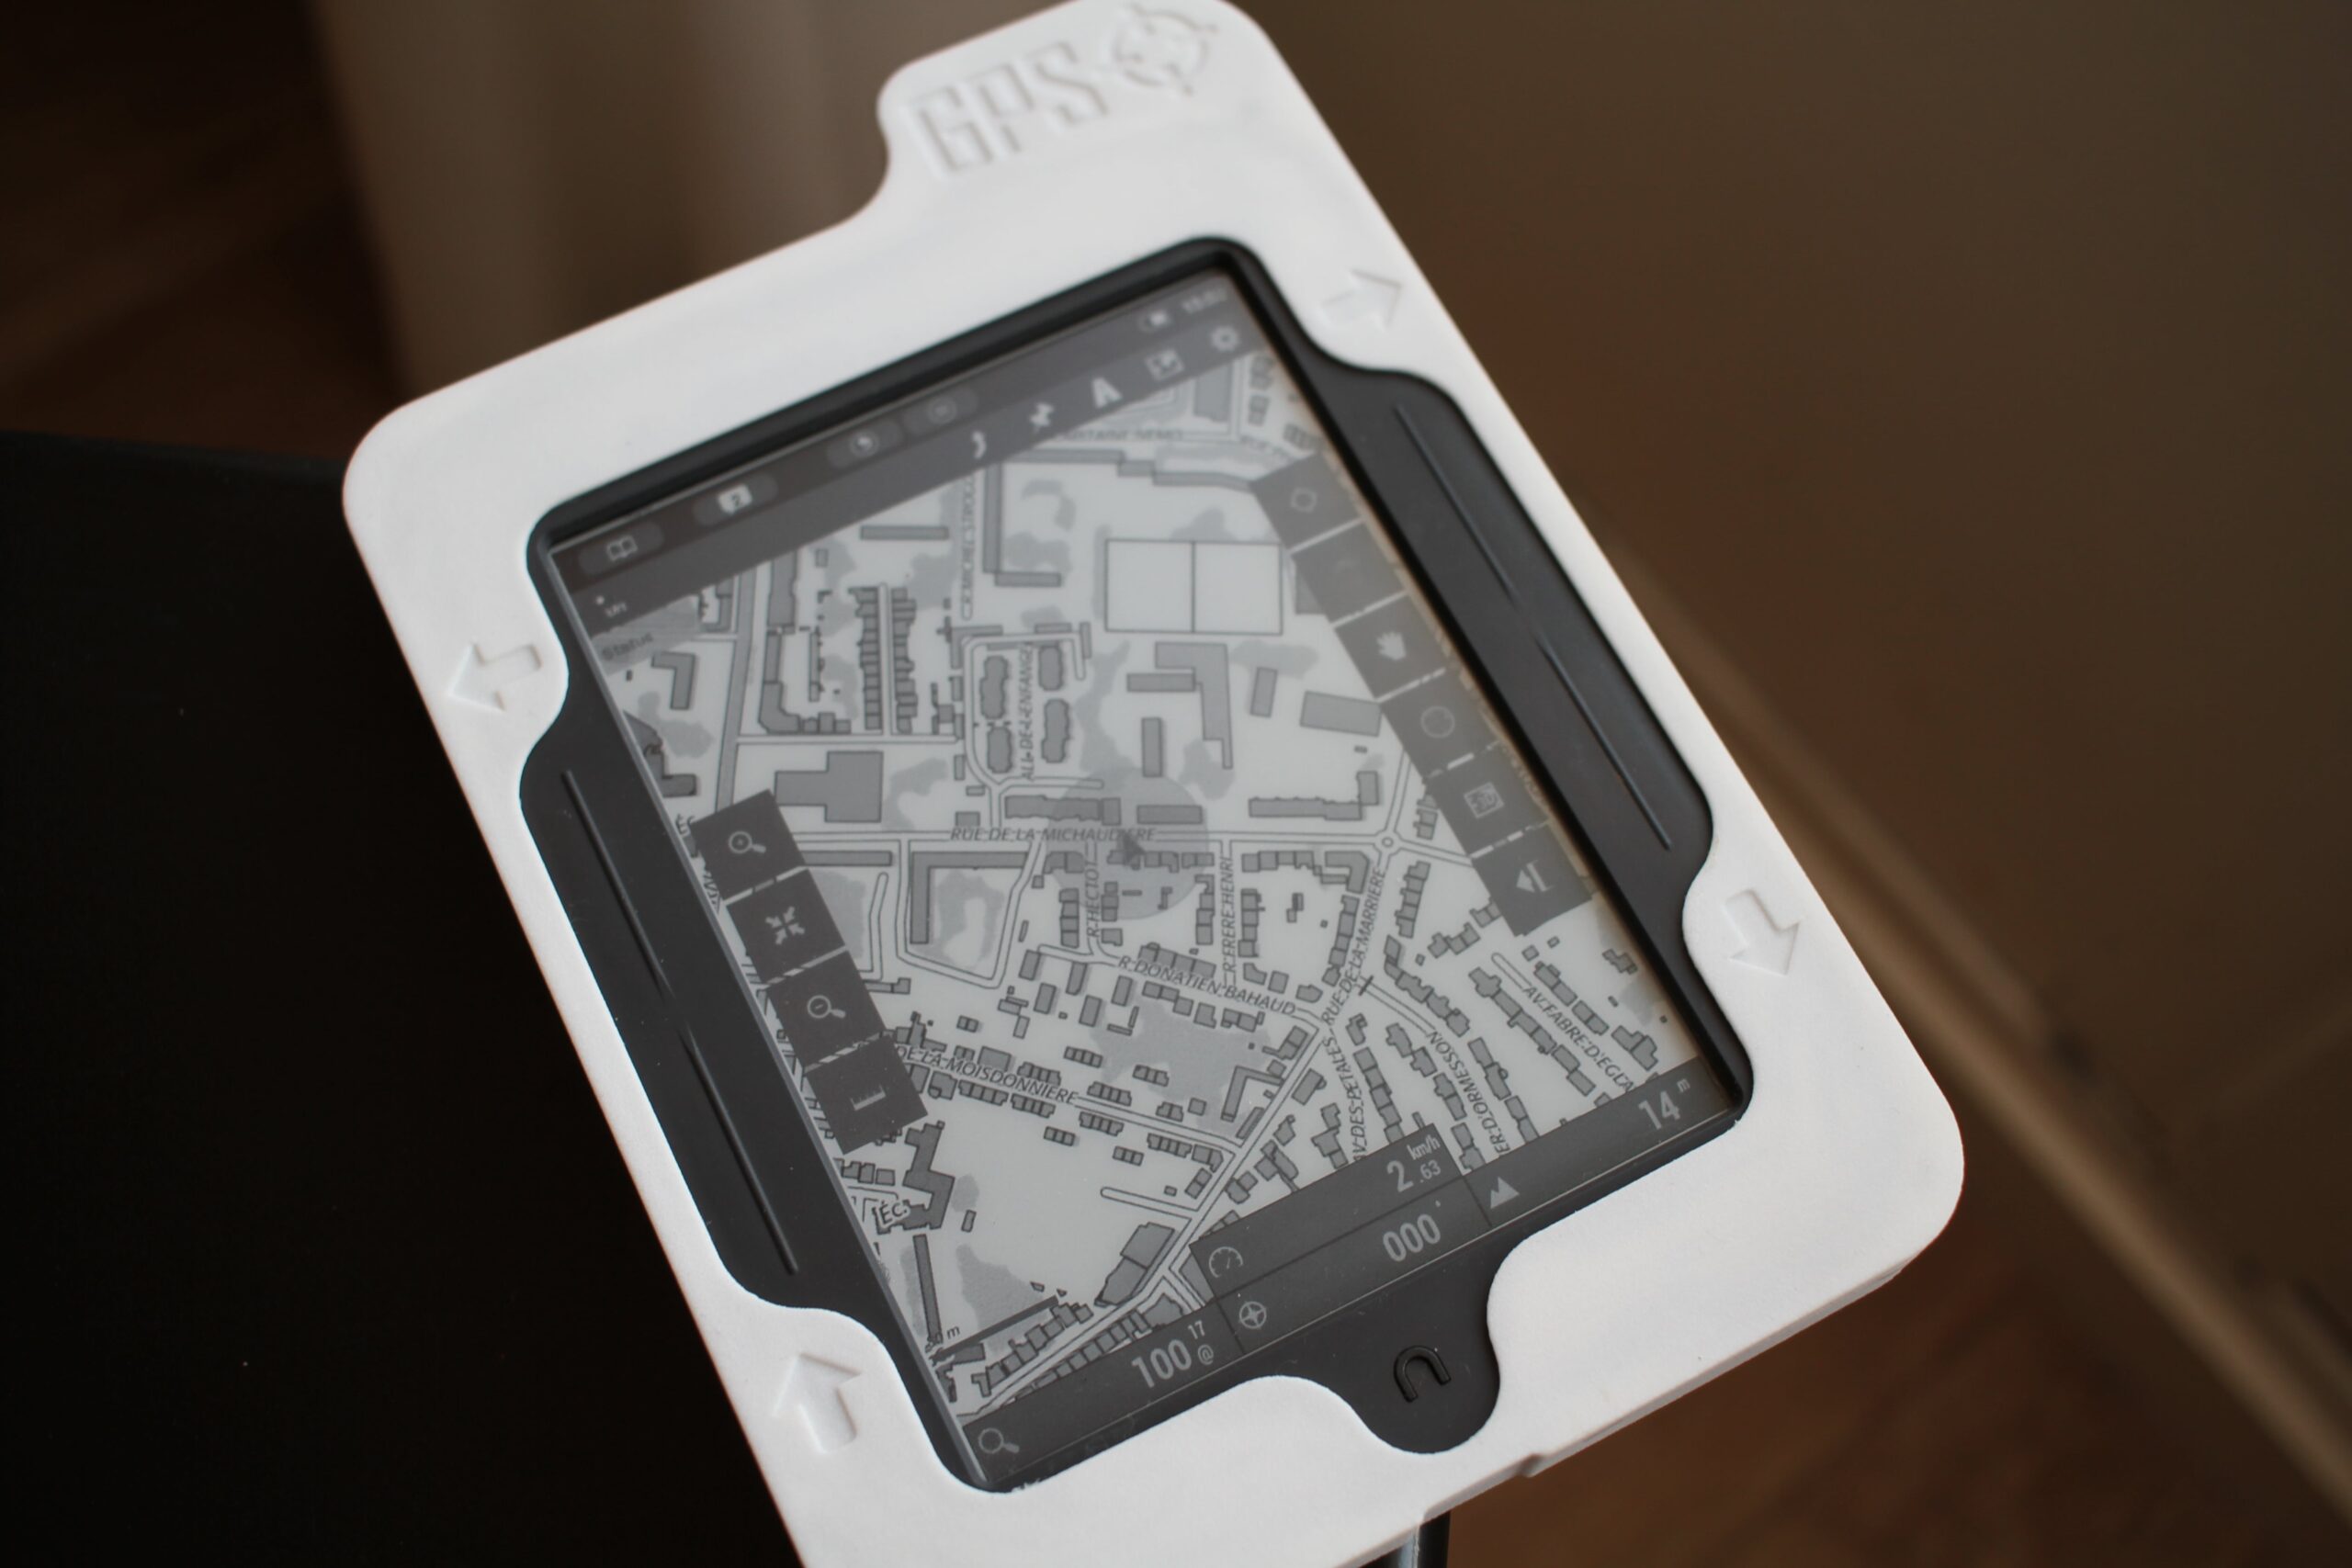
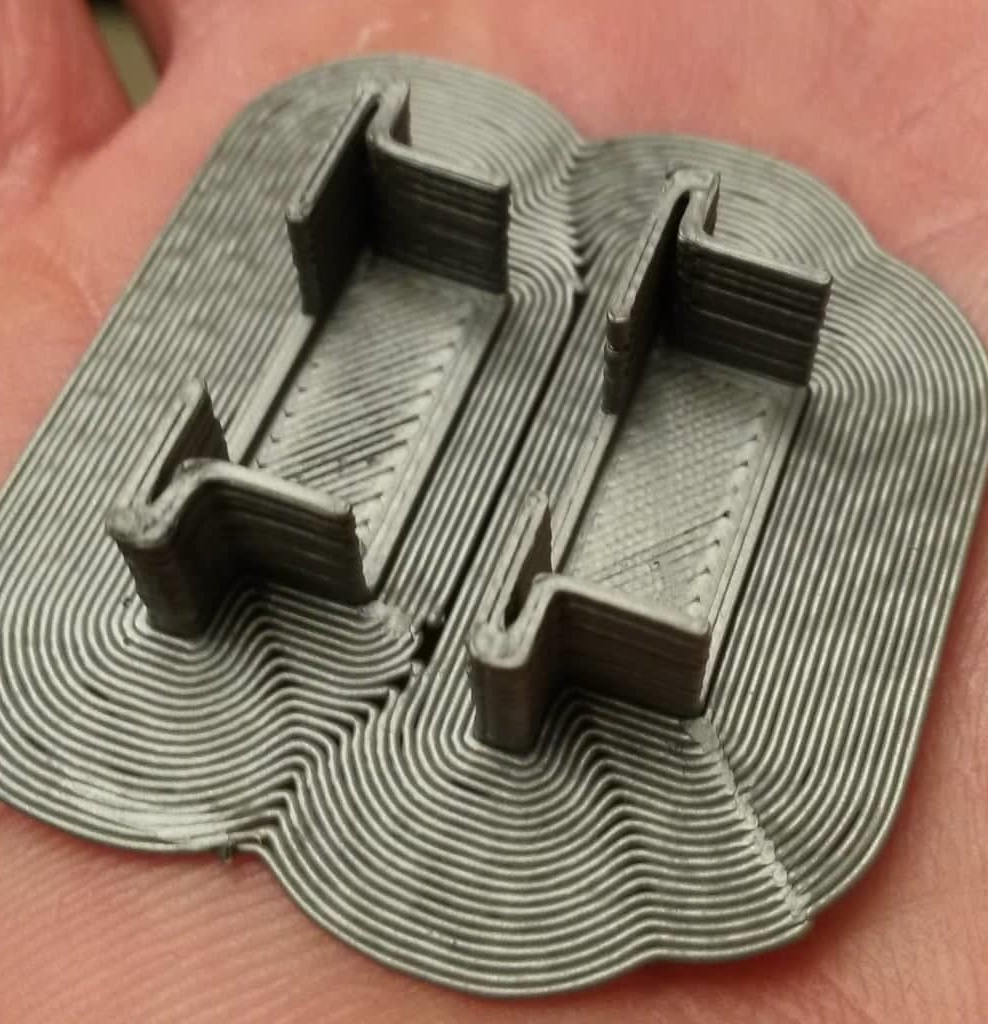
I you decide to use SLS service like sculptéo you should make the parts printed at 99.7% of the original model size. that’s beacause it’s originaly designed to be 3D printed with commercial’s printers where materials are suffrering of narrowing when they cooling down.
The result is quite good, look by yourself :

Prepare the Nook E-reader
Before we begun you should have a decent computer running Windows Operating system, because this will facilitate the process, of course you can do the same with Linux, but you probably don’t need a tutorial i guess.
1) Prepare and Backup
The VERY VERY first thing we will do is to perfom a full backup of your Nook Simple Touch. This is not skipable, because if you mess at some point you could brick your eReader, and in this case you will probably never be able to make it work again. This backup is your warranty !!
🚧 Put your Nook away, don’t plug it to your computer. 🚧
Put your MicroSD in your computer and Download the ClockWorkMod Recovery tool (Thank’s to XDA Members) + the win32diskimager software to write 2gb_clockwork-rc2 ISO on the MicroSD
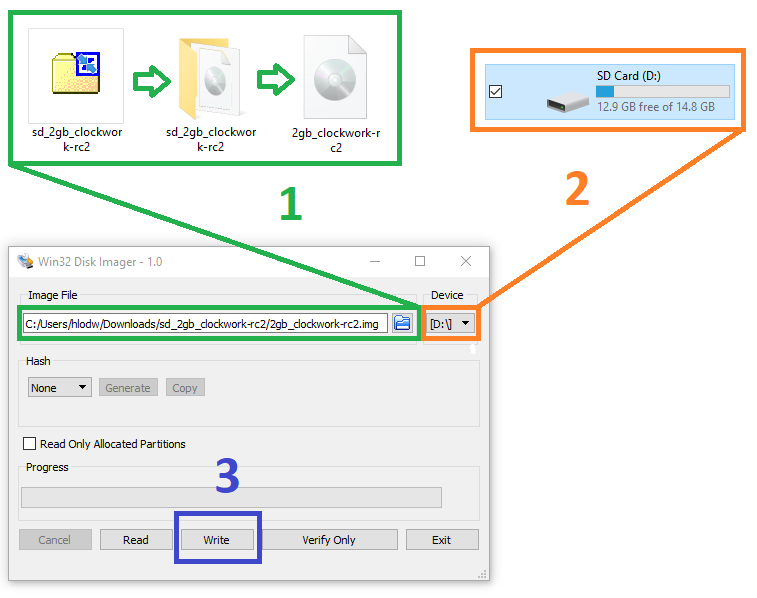

You can now download the Atlas_firmware_1.0 dump backup, it contain a rooted version of stock 1.2.2 firmware with all the necessary android apps, tweaked and mods required.
Just unzip and copy the folder « clockworkmod » in Boot (D:) drive.
At this point your MicroSD contain ClockWorkMod recovery tool but also a copy of the Atlas firmware you want install on the Nook.
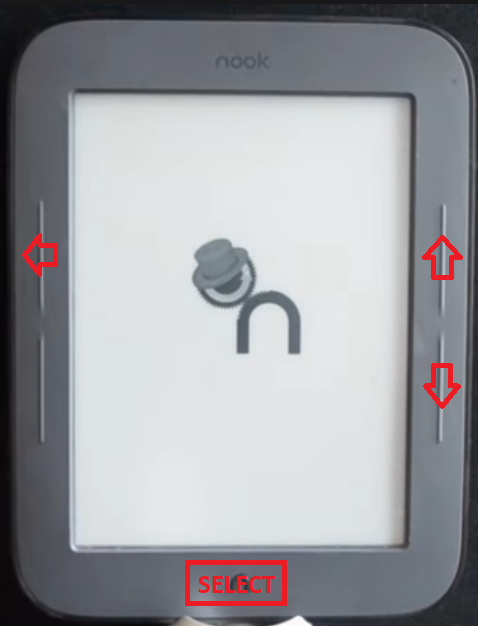
Power Off the Nook, Put the SD card in it, then Power On.
The screen is going to be blank after few second, Press Up or Down key on the right to refresh it 😉

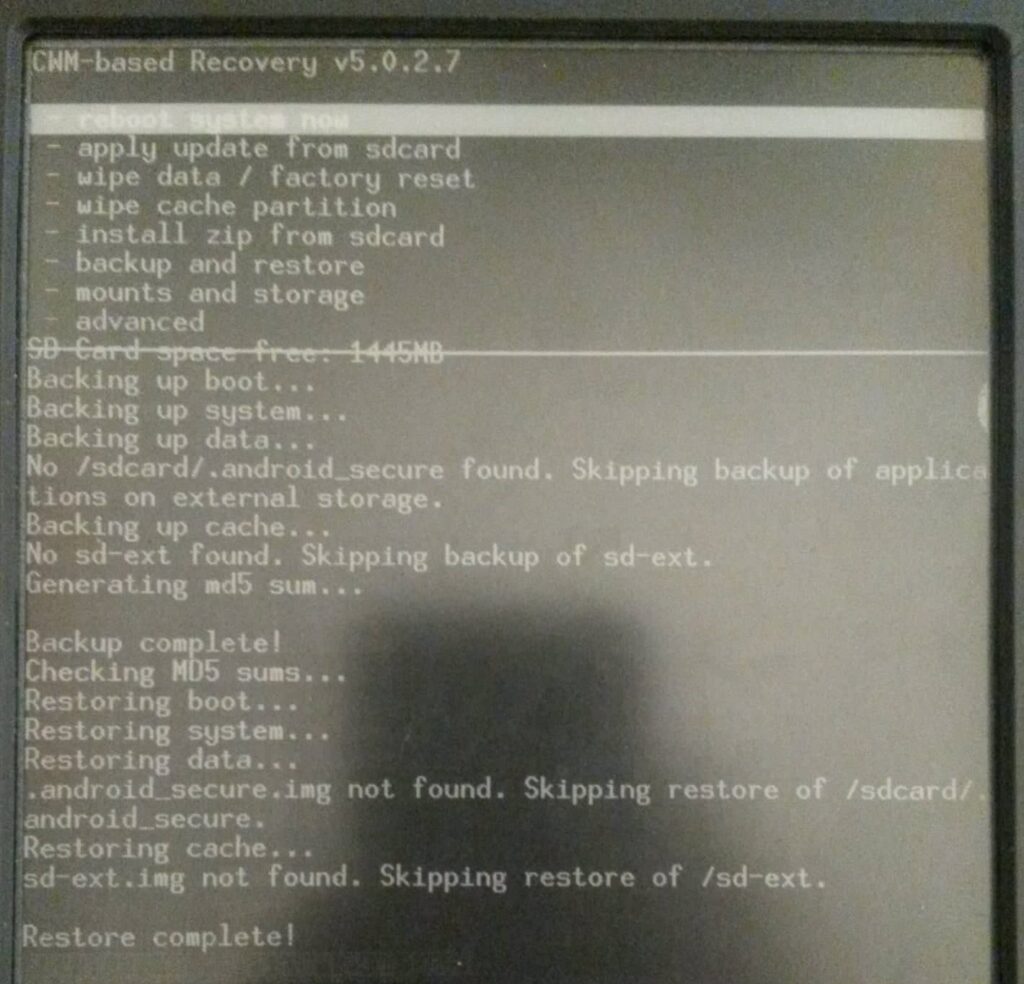
Please, Now backup your Nook by following theses steps :
- backup and restore
- backup
- Wait 10 minutes until it’s finish.. 🚧
- Restart your nook
🚧 Sometimes Clockworkmod can be buggy and need a long press on power buton to force restart after backup 🚧
2) Install Atlas firmware
Assuming you have made a backup as explained upper we will now replace the system of the Nook eReader by the Atlas firmware i provided upper.
- backup and restore
- restore
- – Atlas_firmware_1.0/
- Yes – Restore
- Wait 10 minutes until it’s finish.. 🚧
- Remove the SD card
- Restart your nook
🚧 Sometimes Clockworkmod can be buggy and need a long press on power buton to force restart after restore 🚧
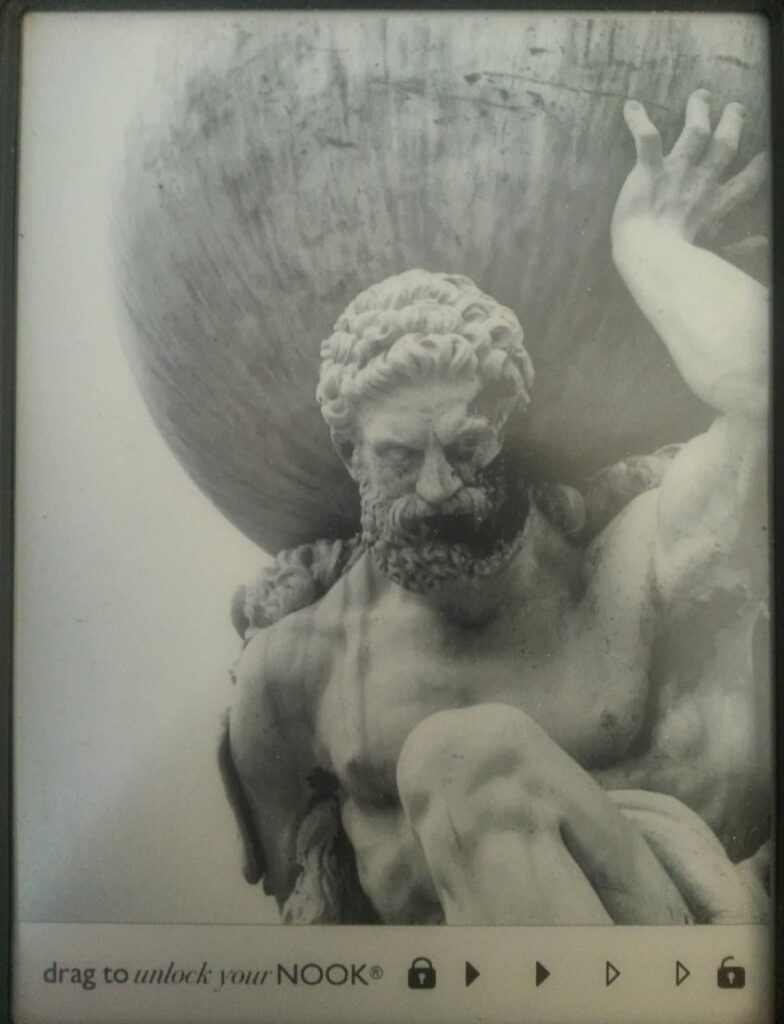
The Nook should now booting, if you are seeing Atlas supporting the world on his shoulders it’s won, the new firmware is now well installed.
🚧 Now you must copy the clockworkmod folder of the SD card on your computer to keep a backup if needed one day 🚧
After you copy the clockworkmod folder of the SD card on your computer you can format the SD card in FAT32 and put it back the Nook.
Mod the hardware
The hardware modding is about switching the battery and adding the GPS module, and the control control circuit to piloting sleep/awake mode of the GP-735 module.
(1) Switch the battery
This will be the simplest operation, you will just need to fix the new one to the motherboard will some glue, silicone, or some duct tape.
🚧 This part requiring soldering skils, the motherboard’s contacts are very tiny. Also you don’t want to cooking the Nook by multiple soldering attempt. So if you don’t feel full comfy about doing this by yourself ask to someone to help you 🚧
(2) Add GPS module without control circuit
The control circuit for the GPS module is a facultative part but i recommand it to maximise your baterry life in real use conditions.
If you choice to not implement the control circuit you only have 3 wire to soldering, so you can directly soldering the JST cable (6 wire).
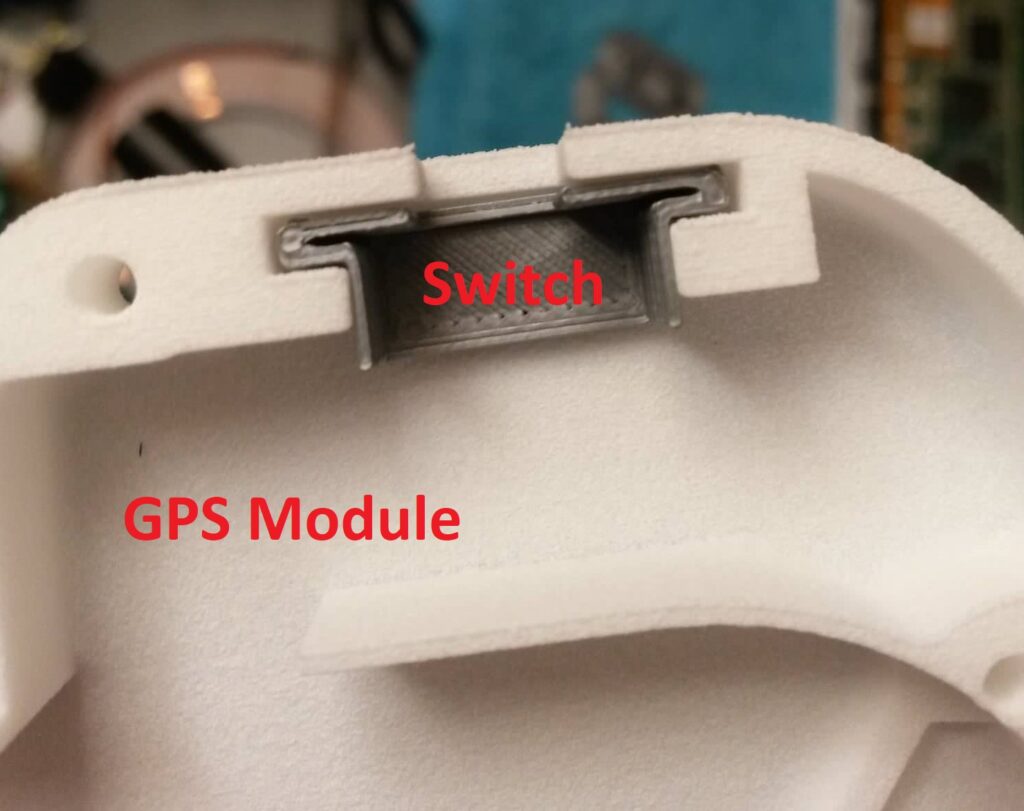
Also if you are using a 3D printed case and don’t have the control circuit this mean you also don’t have the power switch. It’s resulting by a hole on the top of the case, to fix that i create dummy 3D model part who replace the switch when absent. This part is available on my Thingiverse case page.
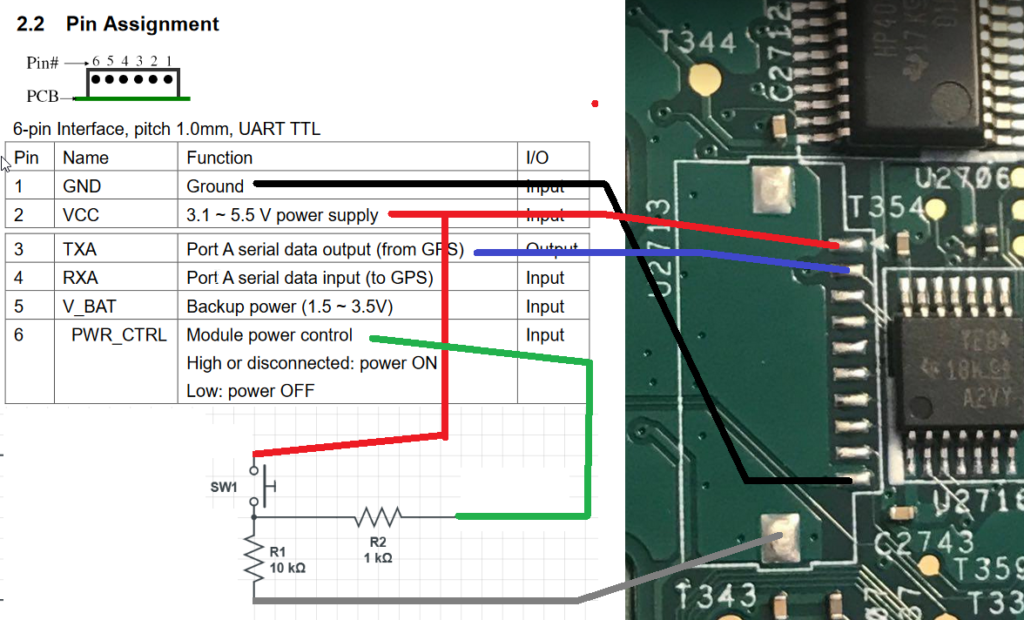
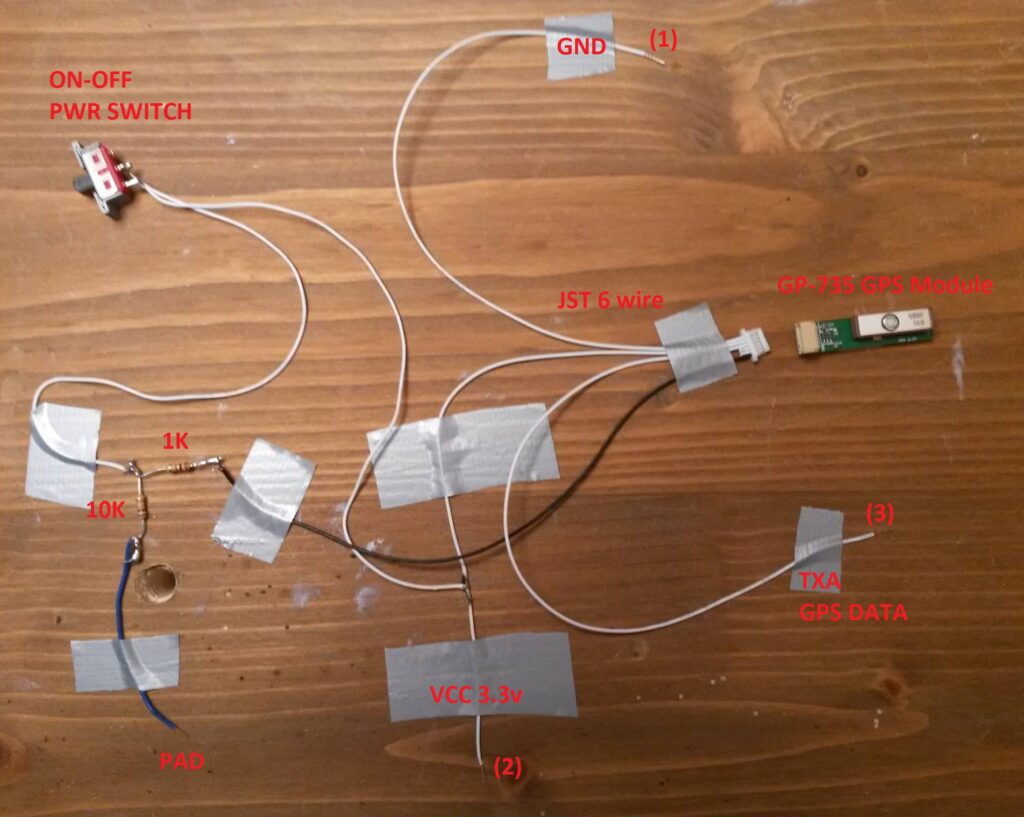
(2.1) Add GPS module with control circuit
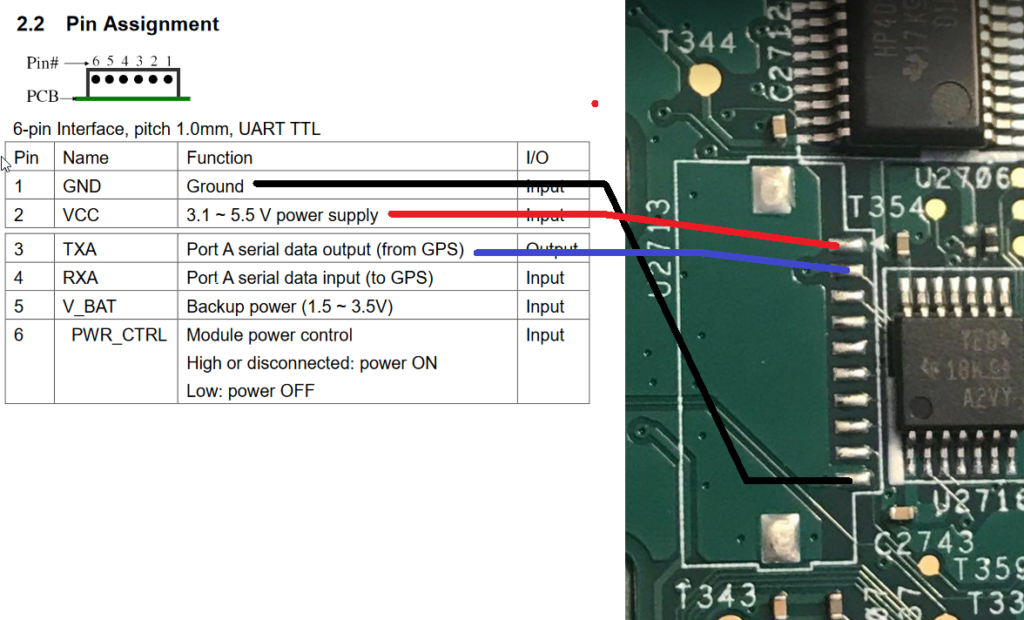
The principe will be the same but we will split the VCC + 3.3v in two wire to power the GPS module on one side and the control circuit on the second side. Also the controle circuit will be soldered to the GND mounting pad of the UART port.
For finish soldering power switch (SW1) and pin 6 (PWR_CTRL) of GP-735’s JST wire to the control circuit like below :
ℹ️ It doesn’t matter what you solution you chose, like a surgery intervention it’s smart to well protect the area around the soldering pads. Copper scotch or aluminium foil can help to thermicaly protect circuits. ℹ️
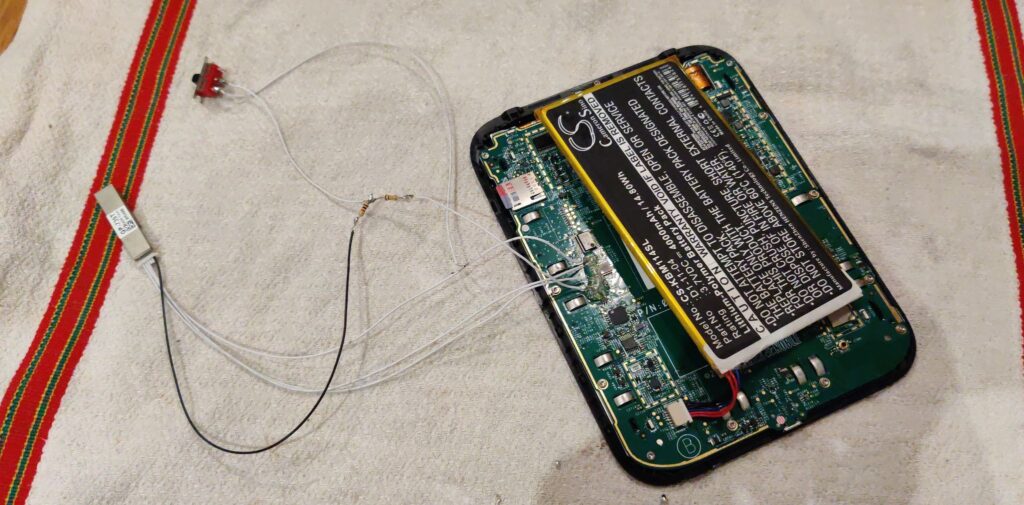
(3) Check if GPS is working
Checking if everything work fine after soldering. Start the Nook and close the control circuit with the switch then open Terminal emulator app to type :
cat /dev/ttyS1
You should get that, NMEA Sentences.. The Nook is receiving data from GPS module, Also the switch should allow to stop and resume the flow of data.
Final assembly
Congratulation, You nook is running Atlas firmware, your GPS send NMEA data sentence to Android and you have received yout 3D printed case. Let’s go put all of thoses together.
🚧 Don’t forgot to put your SD card in the Nook before 🚧
The SD card will not be available anymore, so you must be sure everything is gonna be okay with it, of course you will access to the SD card throught the Nook by the USB cable.
- The Nook should be put screen to the floor direction in the front case part
- Personnaly i use silicone to seal each corner of the nook, Not the side !!
- Put the rear power button in the rear case part and duct tape it in place
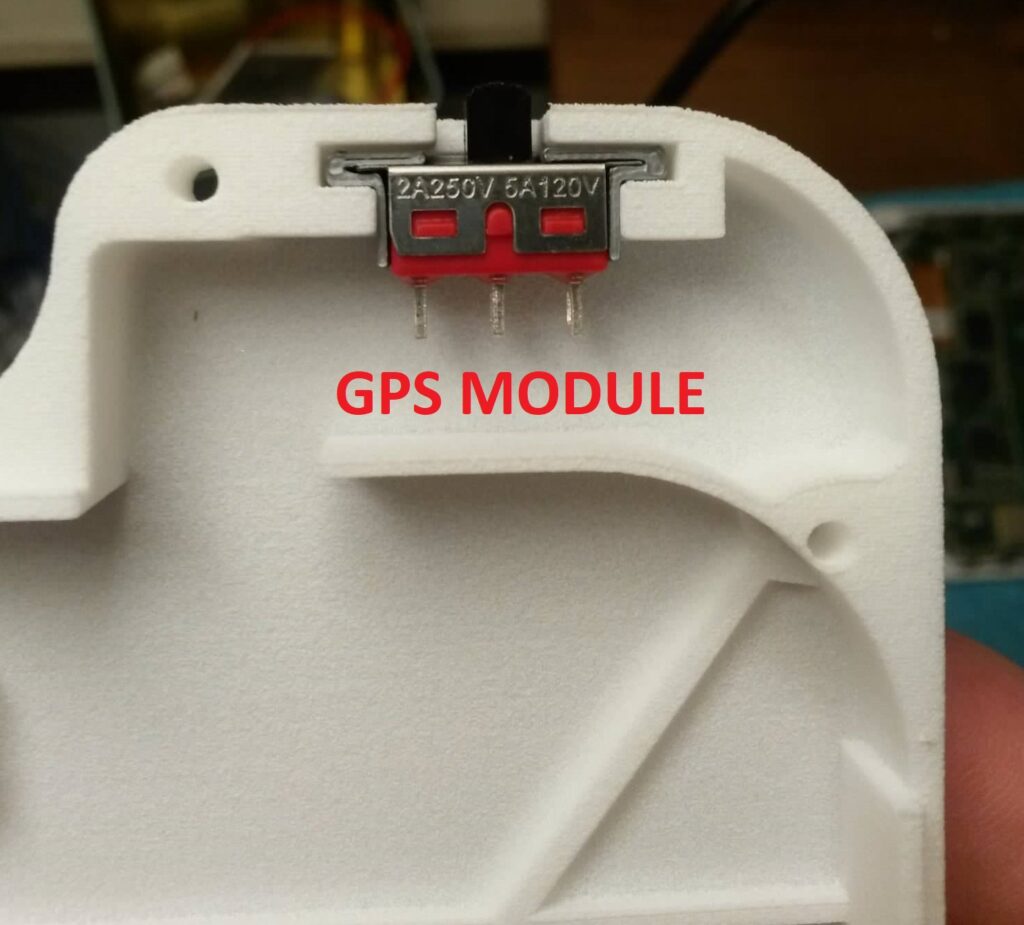
- Cut the side of the switch (control circuit) to fit it in the plastic adaptater
- put the GPS module and the switch in the top right housing
- Check if the read part is going to closing well with the front part
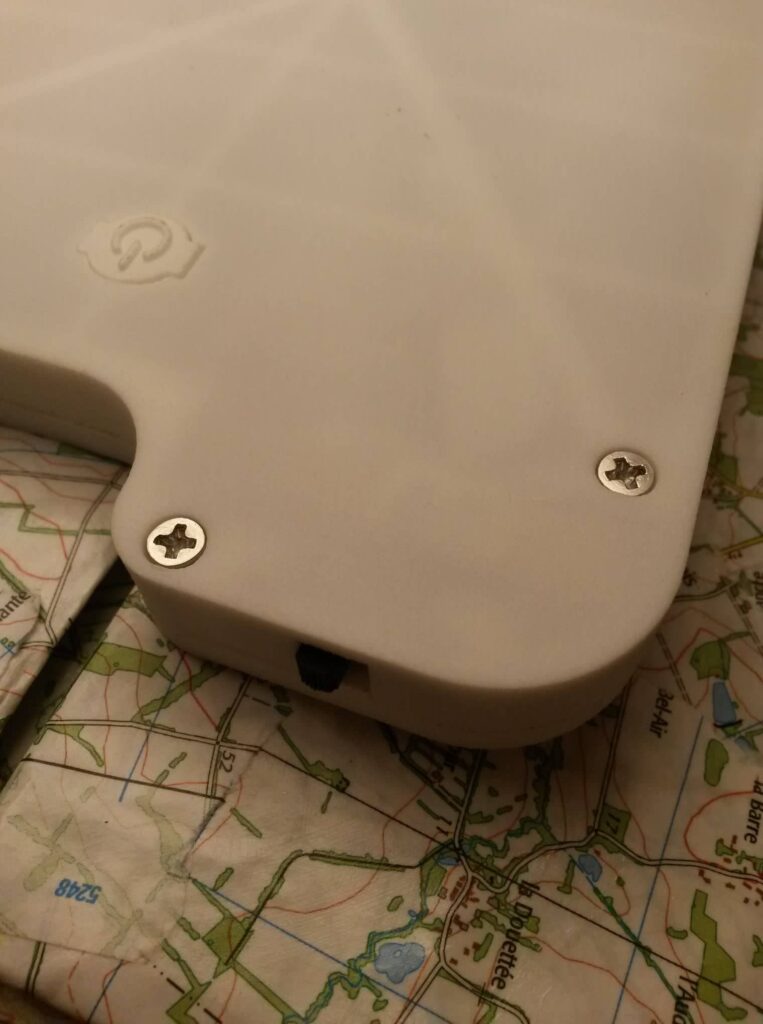
- If everything is ok you can glue all the outline, closing part, and screw it
ℹ️ You can put weight on the case (Nook looking to the floor) to glue and screws it properly. ℹ️
You can put weight on the case (Nook looking to the floor) to glue and screws it properly
Enjoy
A video tutorial will come here to explain how to use it..
2 réponses
Thank you for posting this, super helpful. I am building mine for ocean kayaking.
Hi a new improved and waterproof version is comming, stay tunned 😉