… Work in progress …
All the credits of this is related to Renate for the large amount of work she has done on Nook’s devices over the years.
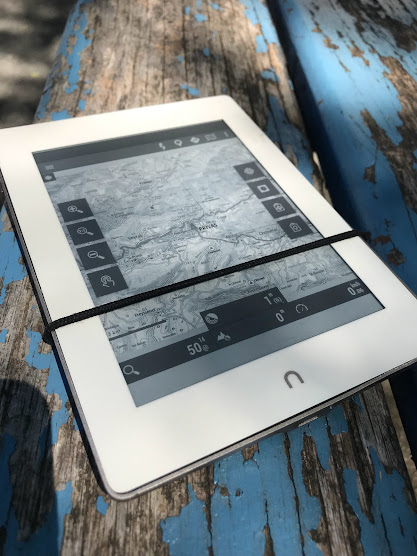
This article is directly linked to my previous project the E-ink GPS topographic’s map eReader.
I’m now back with an evolved version of the eMap eReader. The first version was a good proof of concept but unfortunally was also not perfect..
The new goal was to find another suitable platform to (re)build this project. Because the Nook Simple Touch used before was now too old and has reached the limit of the possibility it’s offering.
As a Reminder, i was looking for an android based operating system eReader, with an UART/Serial Port accessible on the motherboard that allow me to Franckensteinize a GPS module on it. But also enought storage memory to embed big fat topographics maps.
On top of that, the main improvement to perform was about the GPS integration. Previously i used a companion app that binded the NMEA data from the GPS module to the Android mock location. Worked.. but not really an elegant solution.
After long research another B&N Nook tablet looked promising to achieve my goals :
The Nook Glowlight Plus
Also known as the BNRV510 aka Glow2. This eReader has been released in 2015. Made for read for up to 6 weeks on a single charge. it embed Android 4.4.2 over a single core CPU of 1GHz, 512Mo of RAM, and a splendid 6 Inch 300 PPI E-Carta E-ink Screen.
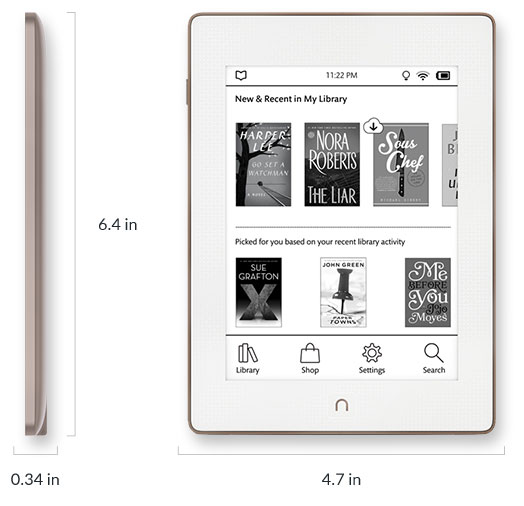
One of the best advantage of the Nook BNRV510 is his waterproof aspect. But this also implie no possibility for external SDcard. This is quite an issue because the internal storage is very small, only 4GB of eMMC. But with luck someone on XDA Developper have found a way to add external storage.

The motherboard contain multiples serial UART port but also contacts point for an external storage that should be usable for the GPS module and an extra SDcard. Lot of data about it here : TemBlast Blog
Prepare you Nook
I will pass this time on the usual Android stuff required for root and prepare the system to let us hack the eReader. You should find every needed informations to achieve that on the XDA Developper forum.
Anyway there is few link :
- https://github.com/Ryogo-Z/nook_ntx_6sl_twrp
- https://github.com/wmahfoudh/rooting-nook-glowlight
- https://help.barnesandnoble.com/app/answers/detail/a_id/4212/kw/4212
- https://forum.xda-developers.com/t/new-nook-glowlight-plus.3230323/page-29#post-77151774
B&N firmware :
- https://su.barnesandnoble.com/nook/piper/4.9/piper/2.37/update.zip
- http://su.barnesandnoble.com/nook/piper/4.7/2.102/update.zip
- http://su.barnesandnoble.com/nook/piper/4.6/2.13/update.zip
- http://su.barnesandnoble.com/nook/piper/4.5/1.14/update.zip
To get into Recovery mode there is the keystroke sequence :
Make sure you have at least 20% battery charge or plug in a charger.
Power off your NOOK.

Press and hold the power button for 3 sec, screen will light up and will start booting.

While booting HOLD (1) the POWER button for 12 sec or until the three boot dots stop/freeze.

Press and hold the power button for 3 sec.
While booting HOLD (2) the POWER button for 12 sec or until the three boot dots stop/freeze.

Press and hold the power button for 3 sec.
While booting HOLD (3) the POWER button for 12 sec or until the three boot dots stop/freeze.

Press and hold the power button for 3 sec.
While booting HOLD (4) the POWER button for 12 sec or until the three boot dots stop/freeze.

Press and hold the power button for 3 sec, let the NOOK fully boot up. You will get Factory Reset screen. THIS WILL ERASE ALL YOUR SETTINGS & DATA.
You should be done with this before go further. A rooted device with ADB access but also a moded recovery like TWRP will be required later and are not skippable.
Opening The Nook
Obviously oppening the Nook eReader will be needed. A large amount of glue is present due to the waterproof aspect, so it’s not so easy to open it. Be carrefull during the operation. The left side and corner contain the screen connectors.
This video below related to a battery change tutorial explain the openning process :
Hardware moding
The Hardware moding will be essentially soldering. You need to take your time to make a proper work. There is two main mod to perform, the first is to reach the UART serial port to get the GPS module connected. The second is to connect an SD adaptater to the storage interface throught the test points.
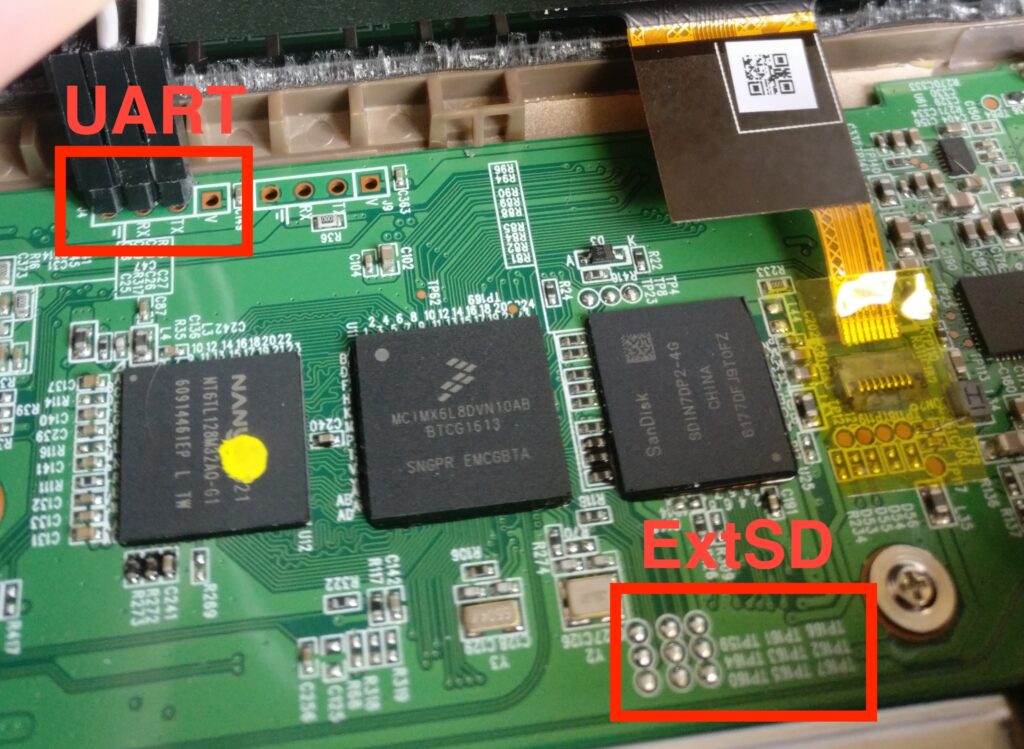
UART Serial
Only 3 wire will be required for the UART connexion, the GND, RX and V.
On this project i still use a GP-735 GPS Module from sparkfun, light, compact and low-consumtion. connected with a JST wire.
According to the the documentation the TXA from the module must be connected to the Glow RX :


Storage extSD Interface
Actually i relate success tests with 64GB and it seem some with 128GB microSD card.
This XDA thread and the original website who descibre how to cover the mod :
- https://forum.xda-developers.com/t/adding-an-sd-card-to-glowlights-2-3-4.3944830/
- http://www.temblast.com/blogs/glow2/blog.htm
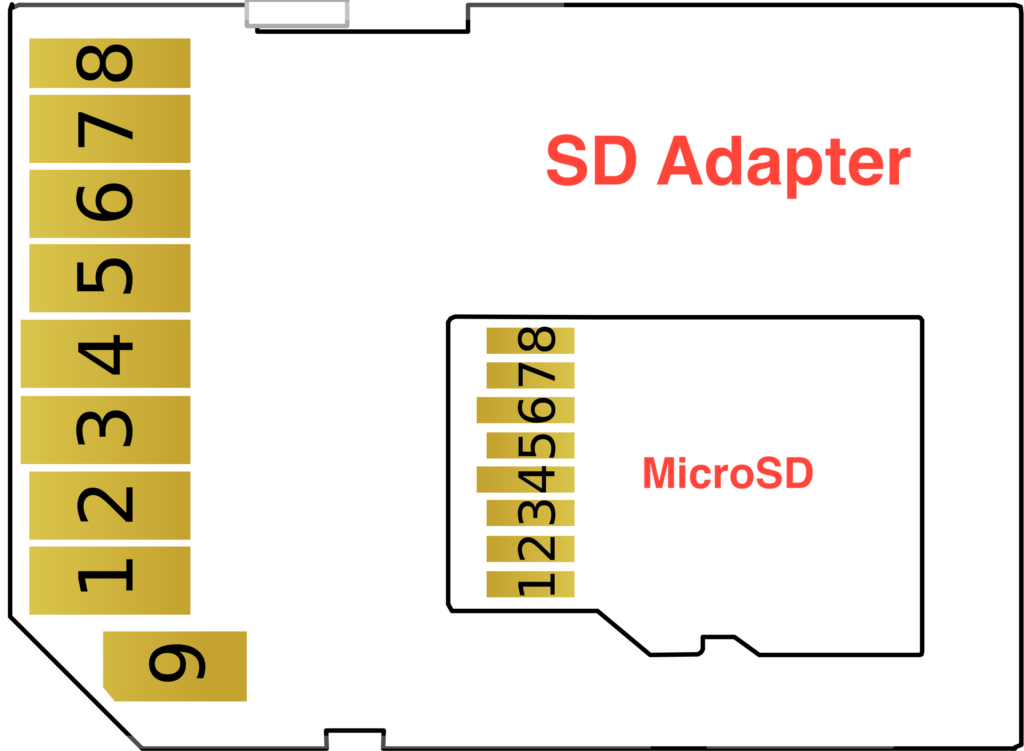
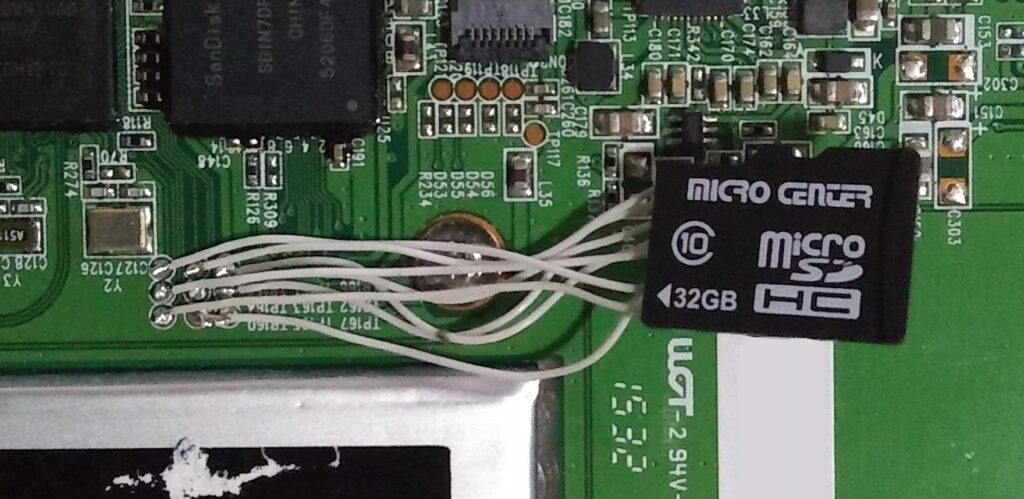
| Glow PCB | Use | MicroSD | SD Adaptater |
| TP161 | D2 | 1 | 9 |
| TP162 | D3 | 2 | 1 |
| TP163 | CMD | 3 | 2 |
| TP166 | VDD | 4 | 4 |
| TP164 | CLK | 5 | 5 |
| TP167 | GND | 6 | 6 |
| TP159 | D0 | 7 | 7 |
| TP160 | D1 | 8 | 8 |
| TP165 | /CD | GND | GND |
The global result should be like this :
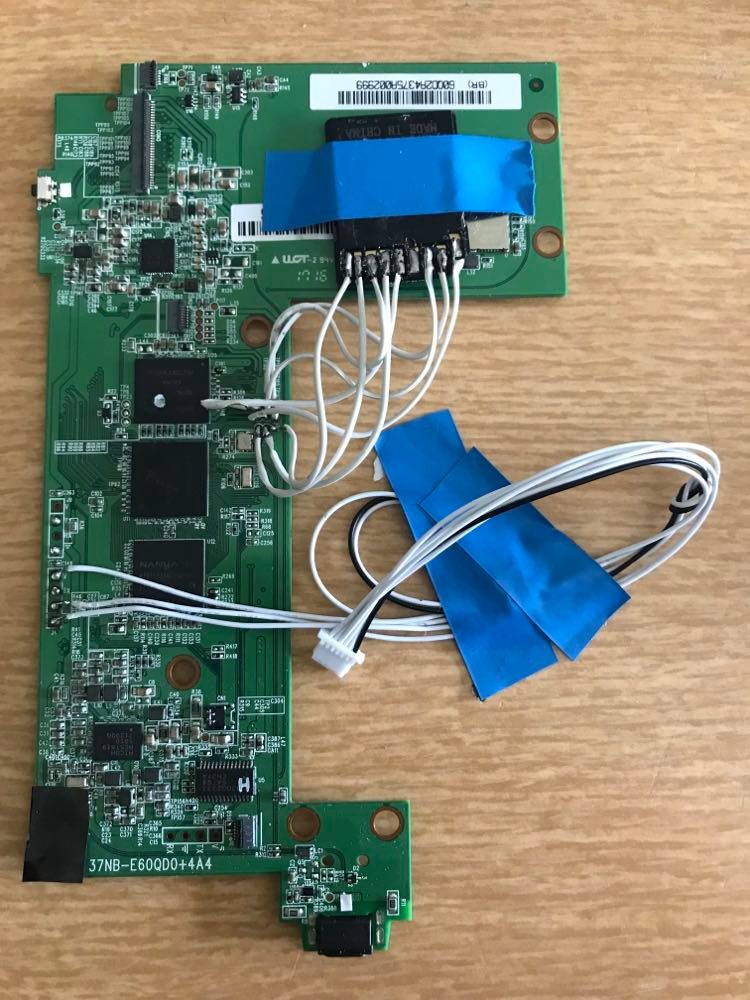
Software moding
Soldering work is now over, you can remount parts of the Glowlight, reconnect the screen. We will concentrate on the software modification required to enable the UART for the GPS and how to mount the storage extSD in the system.
About the UART, his original function is to serve as a serial console as /dev/ttymxc0. So we have to disable this usage in Android to be able to use it as a NMEA/GPS input. If you are curious you can connect use the code bewlo on an Arduino UNO board then you will be able to see the console output.
Arduino code with GND and RX <-0 connected to the Nook GND and TX :
void setup()
{
    //Serial.begin(9600); // Speed for Android
    Serial.begin(115200); // Speed for U-boot
}

void loop()
{
    // variable contenant le caractère à lire
    char carlu = 0;
    // variable contenant le nombre de caractère disponibles dans le buffer
    int cardispo = 0;

    cardispo = Serial.available();

    while(cardispo > 0) // tant qu'il y a des caractères à lire
    {
        carlu = Serial.read(); // on lit le caractère
        Serial.print(carlu); // puis on le renvoi à l’expéditeur tel quel
        cardispo = Serial.available(); // on relit le nombre de caractères dispo
    }
    // fin du programme
}
There somes things to edit. all are stored in the android boot image but mounted on a ramdisk when the system is up. So it’s not easily editable.
required modifications for enabling extSD and disabling console from UART /dev/ttymxc0:
- init.rc –> exec command at startup.
- fstab.E60QD0 –> mount table for storage.
- ueventd.rc –> right on directory.
- kernel cmd line –> pass args to init the kernel.
ADB plateform and imgUtil will be required.
First to allow us to edit the content you must understood how to copy the boot image then retrieve it on a computer before edit it then repush it on the Glow storage to visualise the changes in the next boot.
This must be done in recovery mode (TWRP).
# dd if=/dev/block/mmcblk0p1 of=/sdcard/img

C:\>adb pull /sdcard/img

C:\>imgutil.exe img /v /x init.rc
C:\>imgutil.exe img /v /x fstab.E60QD0
C:\>imgutil.exe img /v /x ueventd.rc

C:\>my-editor-but-not-windows-notepad init.rc
C:\>my-editor-but-not-windows-notepad fstab.E60QD0
C:\>my-editor-but-not-windows-notepad ueventd.rc

C:\>imgutil.exe img /v /r init.rc
C:\>imgutil.exe img /v /r fstab.E60QD0
C:\>imgutil.exe img /v /r ueventd.rc

C:\>imgutil.exe img /c"init=/init video=mxcepdcfb:E060SCM,bpp=16 video=mxc_elcdif_fb:off no_console_suspend"

C:\>adb push img /sdcard

# dd if=/sdcard/img of=/dev/block/mmcblk0p1
Below, the detailled steps :
The original init.rc file contain this and must be commented like below :
ORIGINAL :

service console /system/bin/sh
    class core
    console
    user root
    group root
EDITED :
#service console /system/bin/sh
# class core
# console
# user root
# group rootAdd this line at the end of your fstab.E60QD0 file :
/dev/block/mmcblk1p1 /mnt/media_rw/extsd vfat defaults defaultsAdd this line at the end of your ueventd.rc :
/dev/ttymxc0 0666 root rootThe kernel command line contain console declarations then must be edited like below :
ORIGINAL :

console=ttymxc0,115200 init=/init androidboot.console=ttymxc0 video=mxcepdcfb:E060SCM,bpp=16 video=mxc_elcdif_fb:off no_console_suspend
EDITED :
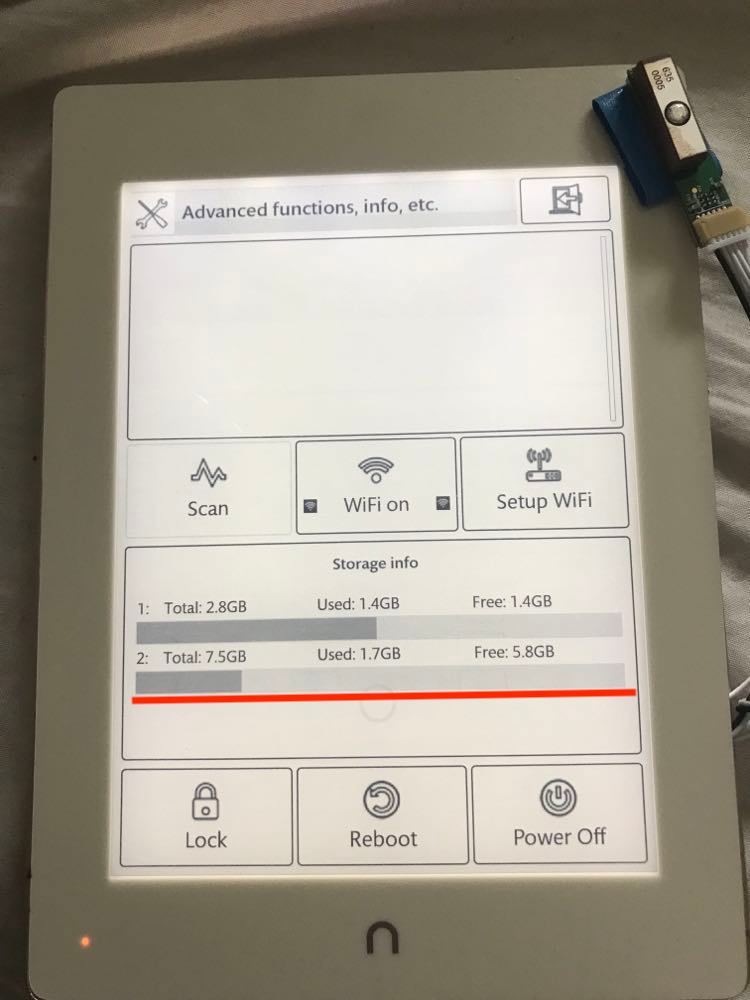
init=/init video=mxcepdcfb:E060SCM,bpp=16 video=mxc_elcdif_fb:off no_console_suspendAt reboot, atfer thoses step you should be able to visualize your storage mounted.
Don’t connect your GPS module during the startup. This will pause U-boot and not boot at all.
Setup the GPS Android driver
This step use very close manipulation than in the last. But for more clarty i have split them.
The Glowlight has no built-in GPS chip so the eReader also not have gps driver installed. But the android environnement is already ready to receive one. For this we will use the driver made by community to manually add GPS support https://github.com/dipcore/gps-glonass-android-driver
This must be done in recovery mode.
In TWRP go in « Mount » then check « System ». This will permit to upload files in /system filesystem.
Take the gps.default.so located in libs/armeabi/ then put it in /system/lib/hw/
adb push gps.default.so /system/lib/hw/Now edit build.prop :
# dd if=/dev/block/mmcblk0p1 of=/sdcard/img

C:\>adb pull /sdcard/img

C:\>imgutil.exe img /v /x build.prop

C:\>my-editor-but-not-windows-notepad ueventd.rc

C:\>imgutil.exe img /v /r build.prop

C:\>adb push img /sdcard

# dd if=/sdcard/img of=/dev/block/mmcblk0p1
ADD THOSES LINE AT THE END :
ro.kernel.android.gps=ttymxc0
ro.kernel.android.gps.speed=9600
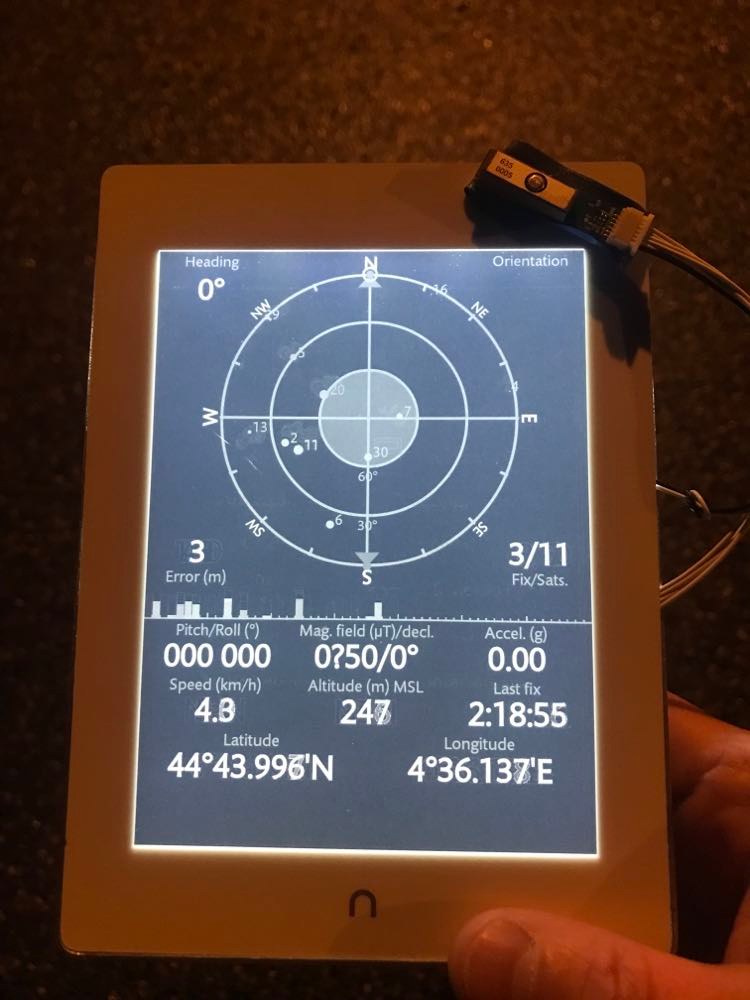
ro.kernel.android.gps.max_rate=1Reboot the Glowlight plus, but does not connect the GPS module during the startup.. Once booted and GPS module connectect you should be able to see NMEA sentence in by doing cat /dev/ttymxc0 :
XXXX visible NMEA sentence…
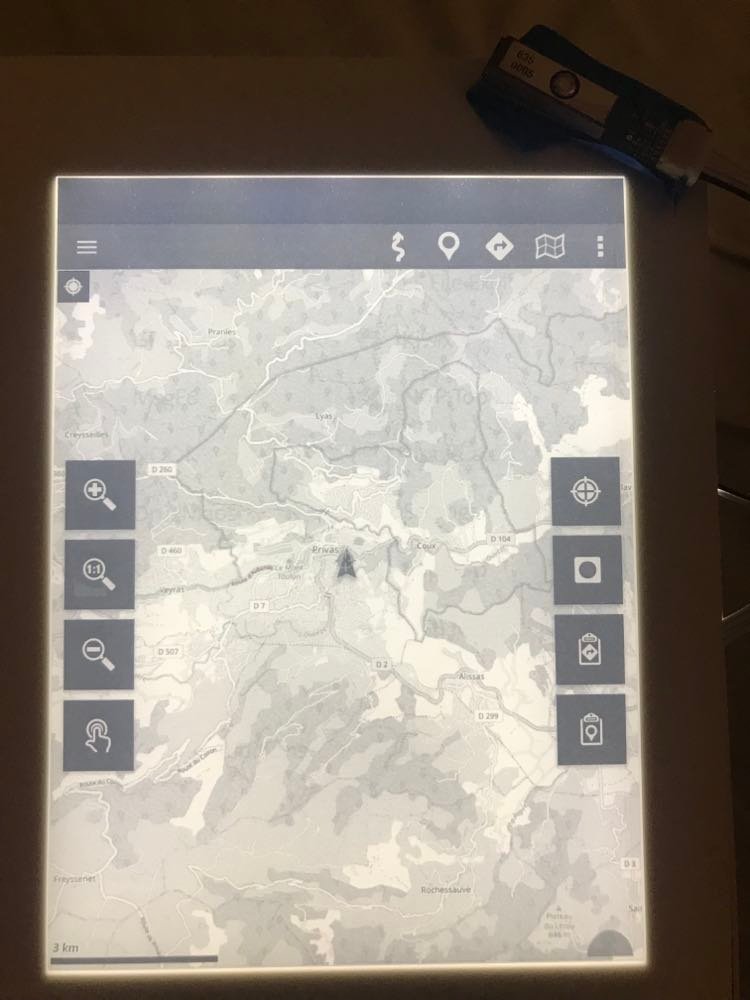
If you install apps like GPS Status or OruxMaps for exemple Android should be able to exploit location.
… Work in progress … I’ve Killed a Motherboard .. Ebay bring me another …
Aucune réponse